
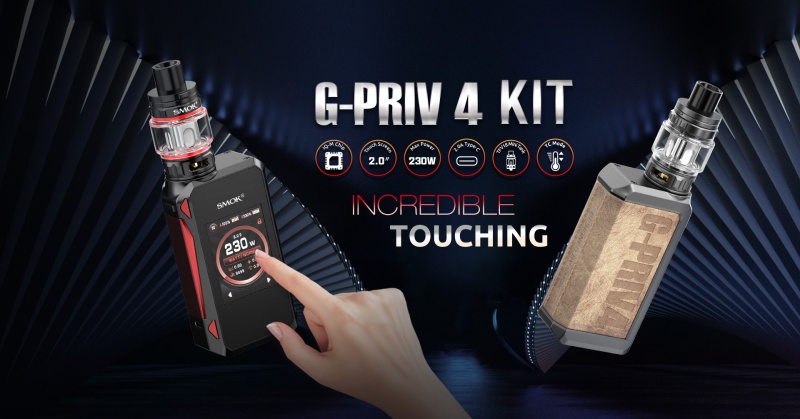
Hello fellow readers! Today we’ll be looking at the second Smok product I’ve ever reviewed, courtesy of HealthCabin. The item we’ll be diving into is the Smok G-Priv 4 Mod.
The G-Priv has gone through quite a number of changes over the past few years, now that we’re at the G-Priv 4. All of them have been dual 18650 touchscreens, and while I’ve never owned any rendition of the G-Priv in the past, I’ll certainly say they’ve stepped their game up for the G-Priv 4. We’ll go through the ins and outs of this mod, and I’ll let you decide whether it does or doesn’t suit your needs.
I want to thank Sue over at HealthCabin for supplying me with the G-Priv 4 mod. As always, this review will be conducted in a fair and honest manner.
Normally, I would include a brief overview of the product using the G-Priv 4 link at HealthCabin, but I’ll be leaving that out in this review and potentially future reviews for the sake of redundancy and being more quick and to the point. I encourage you to visit HealthCabin’s link to the G-Priv 4 Mod for further information regarding this device.
– TEST RESULTS & OBSERVATIONS –
Intro
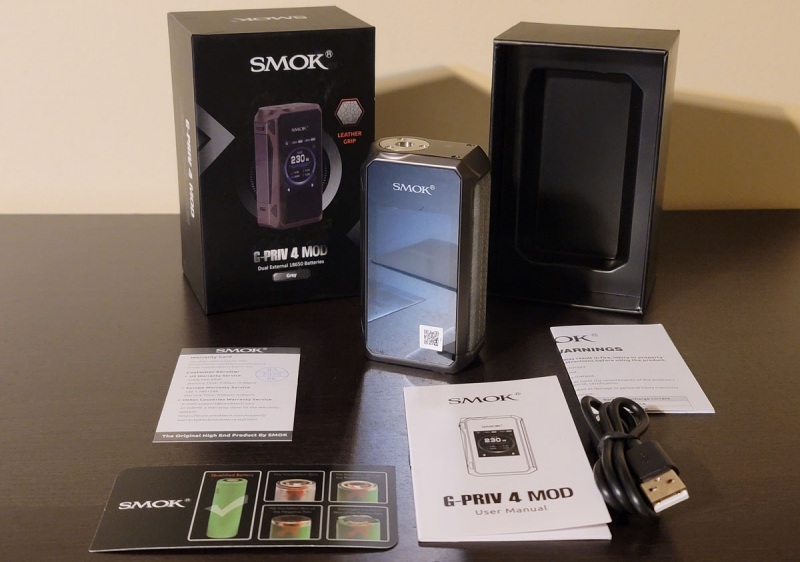
The packaging is quite simplistic but effective. The mod sits in a plastic shell that should easily absorb any bumps during transport. Underneath the plastic shell, sits the the Warranty Card, User Manual, Warning pamphlet, Battery Safety card, and a USB Type-C charging cable.
I’ve had this device for about a month now, so I’d consider that a pretty thorough testing period. This mod has been bouncing around in my car for several hours of the week, as well as posted up on my desk. It’s only been dropped once from the height of said desk, but has suffered no cosmetic or functional anomalies post-incident.
Mod Exterior
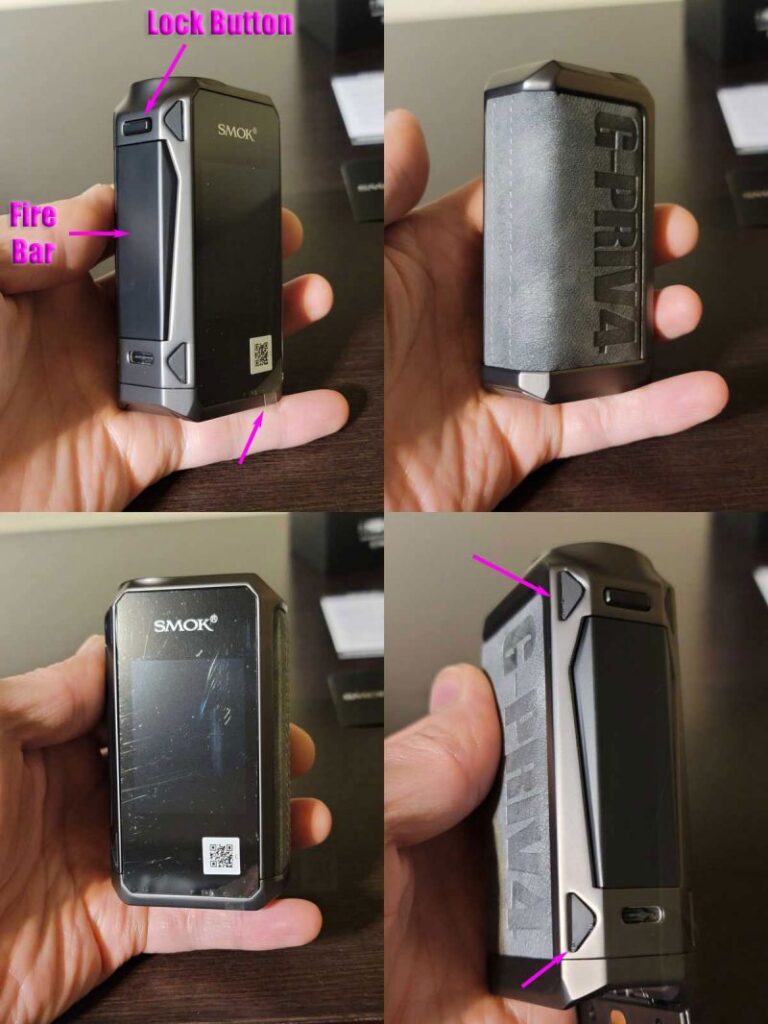
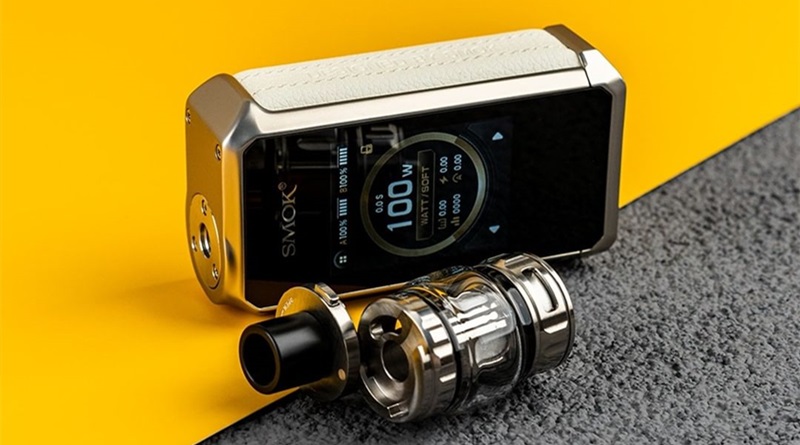
We’ll call the screen the front-facing side of the mod. The screen itself is 2″ diagonally. That’s quite a bit of real estate for the screen, and I think Smok did a pretty good job of using it all up (pictures below). I left the sticker on since this is how it came out of the box. Once the screen protector is removed, the screen itself sort of becomes a fingerprint magnet at certain angles, but this is pretty much to be expected.
To the left of the screen are three things: The small top horizontally-shaped rectangle that serves as a Lock Button, the very large Fire Bar that runs 3/4 of the length of the side, and the USB Type-C charging port at the bottom. I would recommend this port only be used for firmware upgrades or when an external charger is not available. The Type-C charging port is advertised at 2.0A, but I got between 1.7 and 1.8A which is pretty decent and more or less the standard. The mod does support pass-through vaping for those that need a toot while it’s plugged in.
To the right of the screen, you’ll notice faux-leather with two vertical stitches wrapped around from the right side covering the entire back. G-PRIV4 is engraved into the faux-leather in very large print, which I’m sure will be a turn-off for quite a few people, lol. Honestly, at the angle this picture was taken, it’s very noticeable which was done on purpose. Looking at it head on, it’s fairly hidden. Like with most mods this is a sticker, so in the summer be aware of leaving it in your car during hot summer days.
In the bottom right picture above, I indicated with a few arrows visible glue on 2 of the 4 triangular corner pieces; the 4 corner pieces being a reoccurring theme that’s been present throughout the entire G-Priv series. Not a deal-breaker for me, but it would be nice if stuff like this was a bit more hidden.
Mod Top & Bottom
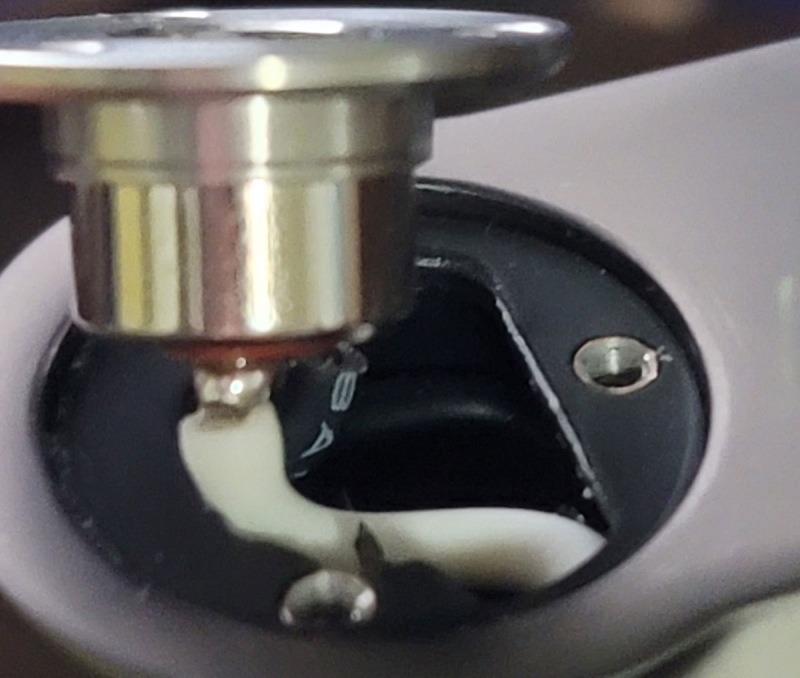
The 510 plate is fastened in with three T5 Torx screws. In fact, everything on this mod that’s accessible with a screwdriver uses T5 Torx screws, which is nice and convenient. Being that the top of the mod bevels in, you’re looking at a 27mm diameter width with no overhang. Maybe 28mm since the bevel is rounded at the top. There’s a black O-ring at the base of the brass/gold-plated spring-loaded 510 pin that’s there to help keep any juice leakage from penetrating the mod exterior. Even so, by the looks of it, the 510 appears to be somewhat self-contained, with the exception of the positive and negative wires that lead into it (photo below with more info).
The battery compartment is accessed by sliding a spring-loaded switch. The knurling on the switch is quite aggressive making it easy to be able to open it with the pads of your fingers instead of having to shove a fingernail or tool into it which is nice for a change. The knurling is also not sharp at all, so it gives you a good amount of grip without feeling like you’re going to be losing your fingerprints. When I accidentally tipped the mod off of my desk onto the floor, the battery compartment remained fully intact although I’m not exactly sure how it landed. At the very least, the battery door can take a decent impact without popping open which should be comforting to some people.
With the battery door popped open, you can see that the inside of the battery hatch has positive and negative markers clearly indicated, as well as the bottom of the battery housing. By and large, regulated mods don’t pose much danger if you happen to put the batteries in backwards, since most regulated chips will cease to function if this accidentally happens – this is intended and is considered a safety feature. However, with unregulated mods, or mech mods, you should be thoroughly aware of your battery specs and orientation, as it can lead to an immediate short and likely thermal runaway. If you like your face and fingers, I’d recommend that you do you due diligence on unregulated/mech mods before attempting to use them. Luckily with the G-Priv 4, you won’t need to be concerned with any of this. The specs do say this device can draw up to 50A, which means you should be using married identical 18650s (same brand, same model) with a verified CDR of at least 25A if you’re a high wattage vaper (check Mooch’s long list of battery tests for verified CDRs).
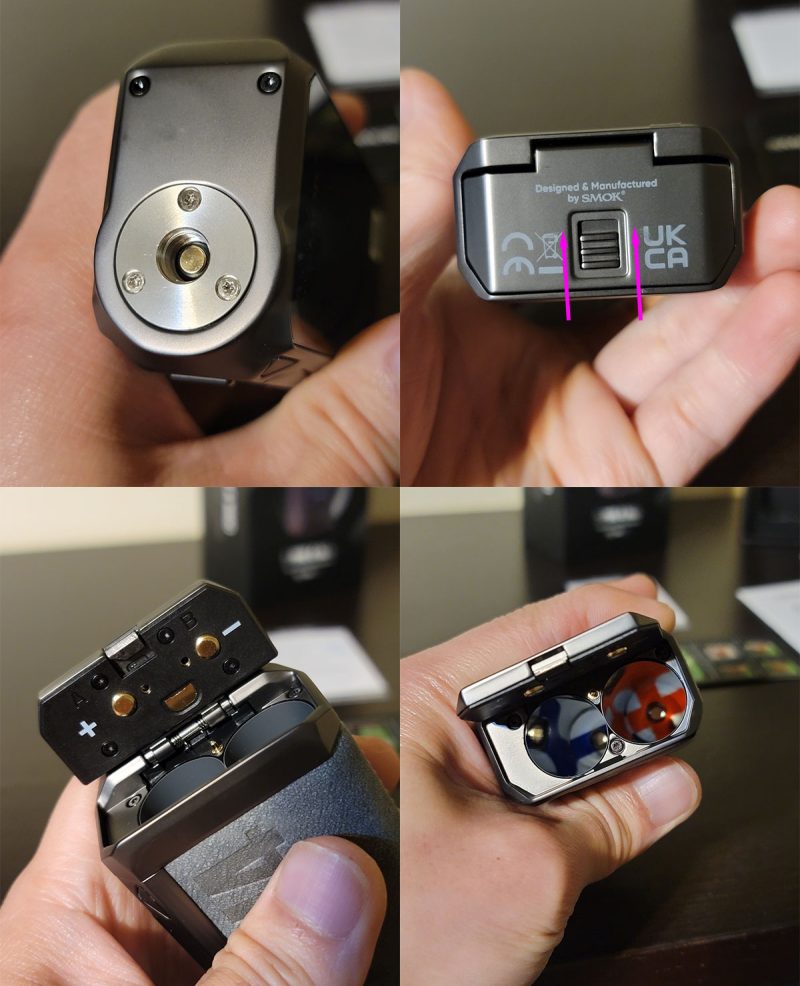
This is certainly not my finest picture, but what I wanted to point out here is that the 3x Torx screws that hold the 510 plate to the mod is screwed into the zinc-alloy frame. Like we’d seen in my previous Smok review of the Mag Solo 100W, they’ve done a great job of making the 510 as strong as possible. Far too many mods these days are using plastic and aluminum-alloy frames to make their production costs cheaper and the resulting mod “lighter”, but in doing so, sacrificing structural integrity when it comes to being tough. I have to give Smok a huge thumbs up for not following into this marketing pitfall.
As I’d mentioned above, you can see how the bottom side of the 510 is enclosed, sealed with another O-ring around the wire contacts. As long as you’re not pouring juice into the 510 and connection and letting it sit there for days on end, I think the seal up job around this connection is pretty solid.
The UI
There’s quite a lot packed into the UI, but it’s fairly easy to understand. The basic firing options give you access to VW (variable wattage), TC (temp control) for Nickel, Titanium, and Stainless Steel, and 4 preset VW profiles that you can save for specific builds and/or settings. Adjustments are made in full wattage and degree increments whether you’re using VW or TC. When making wattage changes, the maximum acceleration in how fast the wattage moves up or down leaves a little bit to desire, but it does have the ability to round robin if you’re making extreme adjustments from low to high, or high to low wattages.
The basics of the UI has been laid out above. In the center of the diagram is the main menu which can be accessed by holding down the Lock Button for 1-2 seconds, and then pressing the little circular button in the top left of the screen. Once in the main menu, you can access:
MODE – When choosing VW, can change the ramp-up speed or “preheat” from Soft, Norm, or Hard as well as the wattage. When choosing TC, allows you to change between the coil metal presets, manually adjusting the TCR for each of them to best suit your needs, as well as the ramp-up speed.
MY MODE – 4 quick-access presets you can individually set up that are particular to 4 different coil resistances or atomizers.
PUFF – Gives you access to puff controls.
SETTING – Gives you access to general mod info (useful if you forget), chip firmware, and 6 different themes where you can change the amount of time the screen stays active when accessing the menu.
The Lock Button is fairly unique and different than I’ve seen in any other device I’ve used or tested to date. At first I felt like it was an addition that didn’t really add much, but I do like what it provides. Its sole purpose is to allow access to the UI, which is used to lock or unlock it by holding it down for 1-2 seconds (being a touch screen, when locked, this also locks the adjustment keys). It also turns the screen on and off by single pressing it, once you’ve set the device how you want it. This is convenient for instances like driving at night when you don’t need or want your device to light up every time you take a puff. Once you’ve made your adjustments, you can hit the Lock Button once, vape until your batteries die, and it will permanently keep your UI off until you press the Lock Button again, or press and hold the Lock Button for 1-2 seconds which will unlock the UI and light up the screen. This also helps in prolonging battery life which is undeniably a pro.
The Fire Bar can be locked by pressing it 3x in quick succession.
Also note in the default UI (top left and top right corners of the diagram above), the 4 symbols near the center are readouts that show coil resistance (top left), puff counter (bottom left), voltage output (top right), and amp draw (bottom right). There aren’t a lot of mods on the market that still show amp readouts, and I for one think it should be shown on all displays. So, for that – Smok gets a big thumbs up. Amp readouts are nice because you can figure out if the battery CDR’s you’re using are appropriate for the wattage you’re vaping on based on the rule of 3. It can also warn you if you’re coil resistance is super low by the amount of amps the chip is drawing.
The touch screen is crisp in response. What this touch screen does that many other touch screens have failed in the past, is that it doesn’t attempt to accommodate the slide or finger swipe. Mods are not $1500 smart phones. Swiping on a cheaper chip feels delayed, laggy, and very lackluster to what we normally expect in a touch screen. By not enabling swiping, the feeling of moving between screens is precise and reactive which I think is a big pro.
Performance
Being that this is a dual 18650, I didn’t add it to my Excel spreadsheet of 21700 mods. I did however test it’s capacities with what I have available. Using a 0.8 ohm Innokin Z Coil, the mod reaches a cap of 7.7 volts, which is a bit shy of the advertised 8.2 volts. However, unless you are using double or triple coil atomizers configured in series, you shouldn’t run into issues using this device in MTL or DL for anything under 1.6-1.8 ohms.
Unfortunately the lowest resistance coil I can find at the moment is 0.21 ohms. Firing it at 230 watts, I get a reading of 31.7A. When calculated out, the estimated wattage cap for this mod is actually around 211 watts which is short of the advertised 230 watts, but let’s be honest – who’s going to be regularly vaping at 211 watts? Based on a 211 watt cap, the max amp draw is calculated to be around 45-46A with a 0.1 ohm coil. This is a bit short of the advertised 50A, but that’s probably a good thing. Anything lower than a 0.1 ohm coil resistance and you’re playing with fire. Not because you have to necessarily worry about the batteries outright venting (it can still happen, it’s just not as likely as in a mech mod), but at a certain point, your batteries are going to heat up exponentially faster for every 0.01 ohm you drop in coil resistance, which is ultimately going to cause additional damage to your batteries and potentially the mod chip. As Mooch is famous for saying, mind your mAhs.
Remember, the wattage you set your mod to is a setting, not a readout. Just because you set a car’s cruise control at 160 mph, doesn’t mean it can necessarily go that fast. This is why I run these tests, so that we can get a more accurate gauge on the performance capabilities in comparison to what’s being advertised. Even though the mod comes up short in each performance category, it’s still an overall good performer.
– CONCLUSION –
The Smok G-Priv 4 mod has surpassed my expectations. In the past, Smok has received a lot of bad press due to their questionable QC, but as the second device I’ve reviewed from Smok in two of their newer releases, I’ve been fairly impressed. The chip in the G-Priv 4 has pretty much everything you’d want from a mod these days, with the exception of Variable Voltage and Bypass (which I think is a joke anyway), and I think the vast majority of the vaping community won’t miss having those two features.
Performance-wise, the Smok fell a bit short of what it advertised, but overall it should serve its purpose just fine for pretty much everyone. The exceptions would be those that don’t want a dual battery mod, and those that may vape using exotic rebuildable atomizers like the Hellvape Seri RDA.
Overall, I’d recommend the Smok G-Priv 4 if you’re looking for a simple touch screen mod with pretty much everything you need.
++ PROS ++
- UI is simple to use and has most features
- Responsive touch screen
- Very large 2″ UI
- Slightly smaller dimensions being that the UI is on the side
- Good hand-feel for both finger and thumb firers
- Fire bar
- Lock Button
- UI has amp readout
- Fits 27-28 mm atomizers
- 510 plate is screwed into zinc-alloy frame
- Battery indicators show percentage
- USB Type-C (1.7-1.8A charge speed which is good, but don’t recommend)
- Battery door is easy to unlatch while still remaining secure
- Batteries sit secure, no rattling
– – CONS – –
- Minor cosmetic imperfections
+- CONSIDERATIONS-+
- Performance is slightly under stated specs
This review was written by Zach == Z-Lee from ECF, click to view original review there with more photos and more details.
