
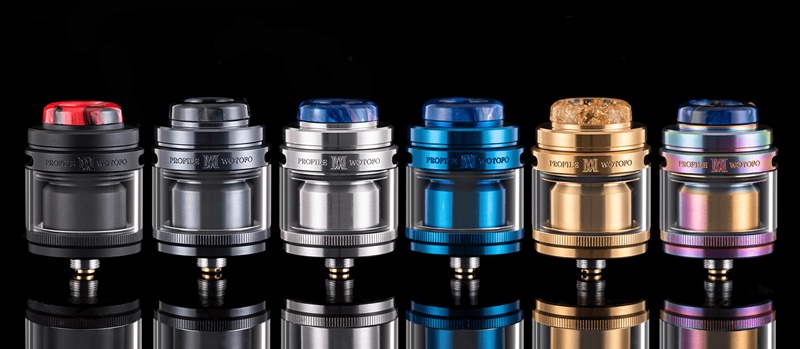
Hello and welcome back for today’s review of the latest rendition of the Profile called the Profile M because this version uses Mesh strips. We all know how well Mesh brings out some of the best flavor in juices and today’s review will tell if the M is up to the task. Let’s find out some information on the M prior to giving my impressions of the it in the review. Let’s get started the Wotofo Profile M RTA Review!
FIRST IMPRESSIONS
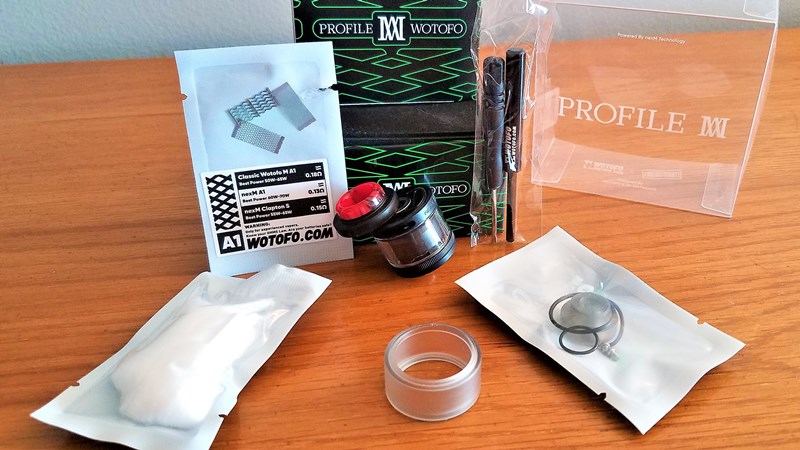
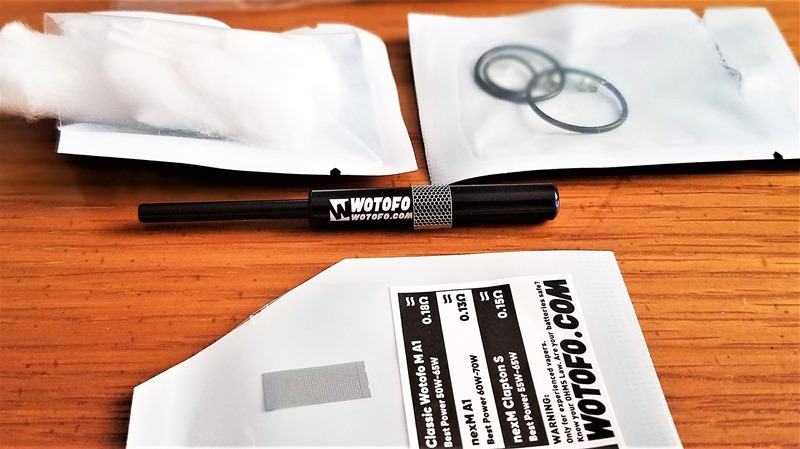
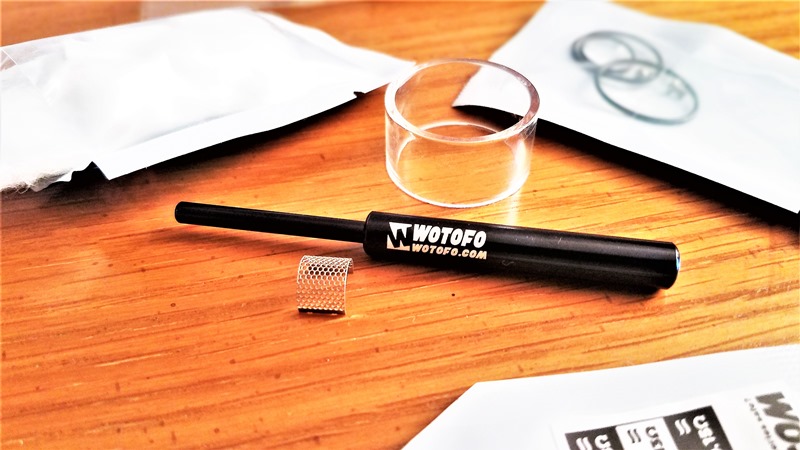
The M comes in the familiar Wotofo packaging with the top cover being clear plastic showing everything that’s included with the M and you get a lot of material. You get the RTA itself, 2 drip tips, straight tube, bubble tube, coil bending rod, screwdriver, 3 large pieces of rope cotton, 3 different types of mesh strips, extra o-rings, extra screws and the owner’s manual.
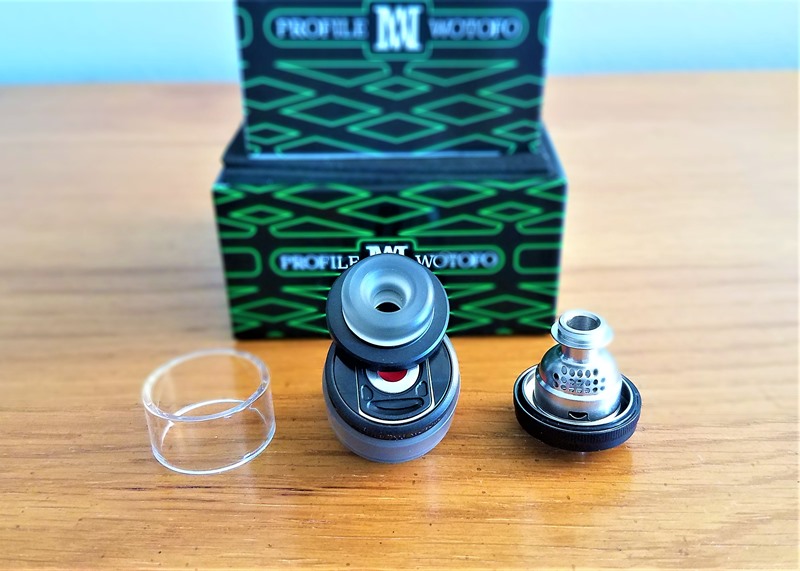
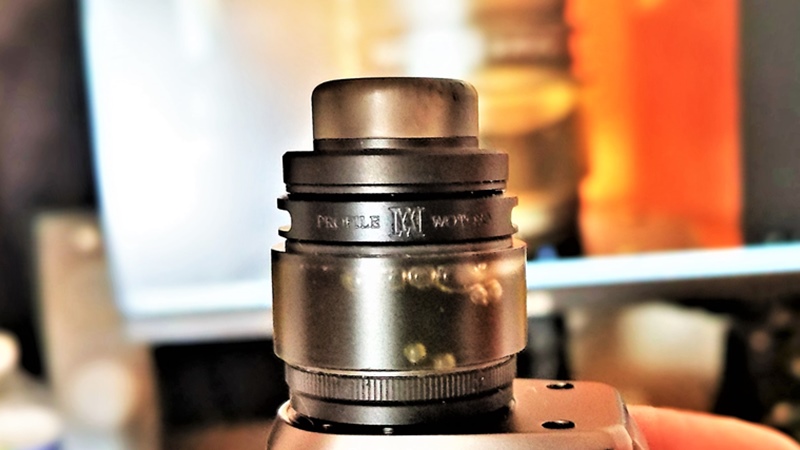
The M is a very small low profile RTA ( NO PUN INTENDED ) so the bubble tube will be replacing the straight tube that it ships with pre installed. Sadly the bubble tube is not glass but the frosted gray color looks very good and the 2nd drip tip matches in color.
The M is a 4 piece RTA including the drip tip and uses a sliding top cap which makes filling easy. There is a flexible membrane that covers the fillport and reseals when the juice tip is removed after filling and it also helps if the top cap slides open while in a pocket.. The M uses 2 chambers, inside the main chamber is a removable inner chamber that channels the airflow down to the mesh strip. You can leave the inner chamber in place or remove it and place it over the mesh coil when reassembling, on the deck are 2 screws that attach each mesh end piece using a clamp and that is where the tiny cut out at the bottom of the inner chamber should sit,doing it this way makes reattachment to the tube much easier.
Here you can see the 3 main pieces of the M apart, the deck pictured on the left uses a clamp style to attach the mesh ends, you don’t need to unscrew very much to open each side of the clamp ( not spring loaded ). The peek insulator that the cotton
sits on is spring loaded making it easier to instal your wick, when installing your wick pull the cotton as well as pushing down on the insulator, give each end a angled cut, thin the tails a bit before installing them into the wicking slots, saturate the coil with juice and wicking should be done.
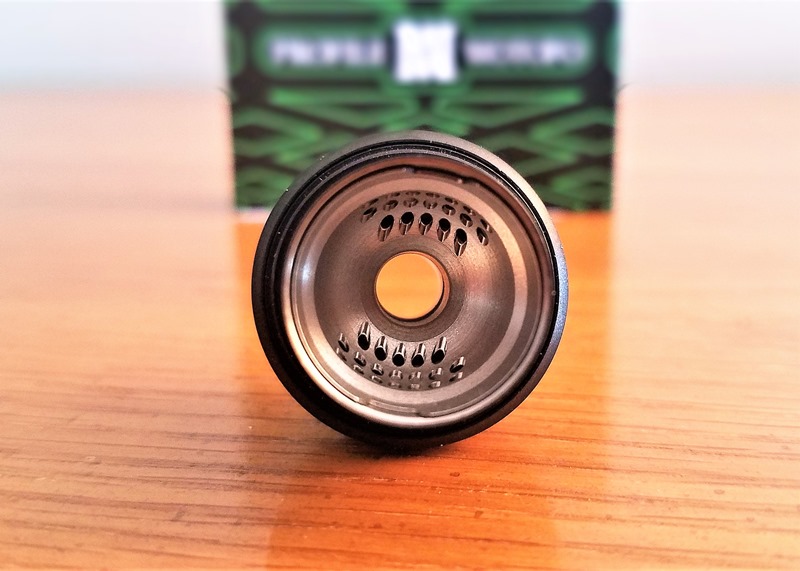
The middle image shows the main chamber with the bubble tube installed, notice the top section that has been milled for the air supply’s path to the inner chambers many holes that feed air to the coil.
The inner chamber on the right installs into the main chamber at the top via a o-ring connection that just pushes into place, there are 19 air feed holes on each side of the inner chamber.
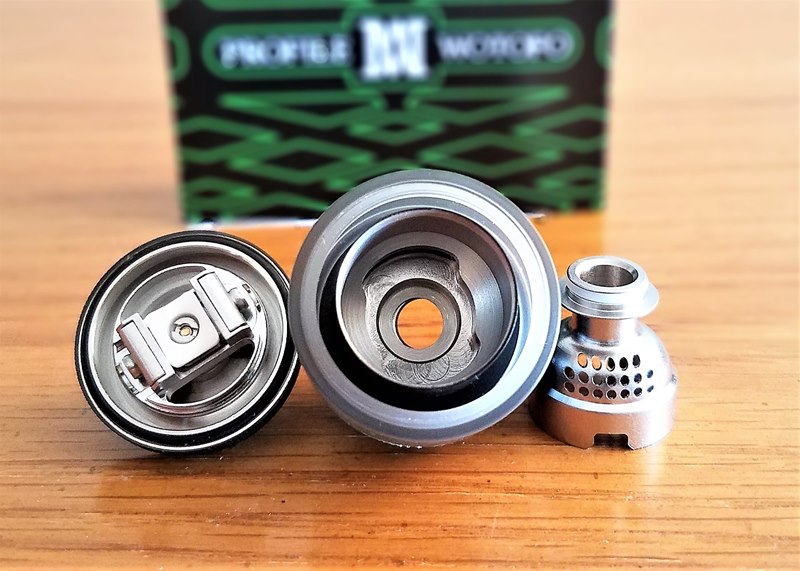
As you can see with the inner chamber installed in the main it’s air holes are sloped in a downward pattern and there are 38 holes all total giving plenty of airflow to the coil.
Wotofo gives the user everything they need with the M, for those that have never used mesh strips in a RTA, it’s really easy to install your coil that comes flat as the bottom of the picture shows. Take out the coil bending rod and form a bend in the coil when placed on the rod and keep it straight.
This is what the finished coil should look like.
Unscrew the 2 screws on each end of the deck maybe a half of a revolution and put each end into each clamp without deforming the coil gently push down making sure the coil is straight and tighten the screws. I have tried all three coils but have a favorite that will be featured in the build photo. As most of us know Mesh coils are flavor bangers but mesh suffers from one thing ( no warmth or very little of it ). I reviewed the Manik Pod System a while ago and I was introduced to their clapton mesh coil and really liked it because I was able to get some warmth from it so that is what I decided to show in the build and wicking photos.
You don’t really have to dry burn mesh but I do it to get any oils that might have been transferred from my fingers to the mesh strip when installing it to the deck.
You don’t need a lot of wattage to dry burn any of the mesh strips. 12 or 15 watts will work fine, using gentle pulses to get a small glow is all that’s needed.
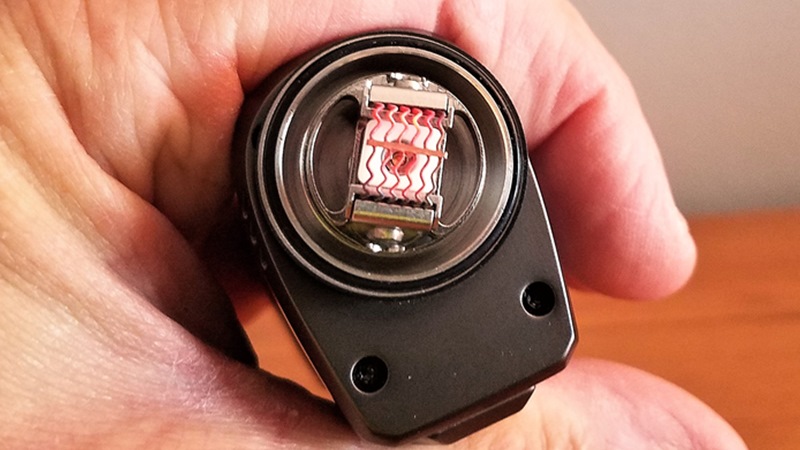
I’ve already told you how to wick the M and when finished it should look like this picture shows, don’t be afraid to thin out the tails but these are large wick slots so thin a little at a time if it’s your first time using a mesh RTA until the wick ends lay nicely in the slots without packing them in and as I said earlier saturated with juice. If you use the method of putting the inner chamber on the deck and then joining the tank to the deck you have another benefit to do it this way, if the inner chamber won’t fit on it or is tight fitting you have to much cotton in the tails body.

If wicked correctly you should see plenty of bubbles in your Tank. A note of caution is when filling with juice pay attention to the gasket membrane because it can and will come out if your juice bottle tip catches it on a angle.
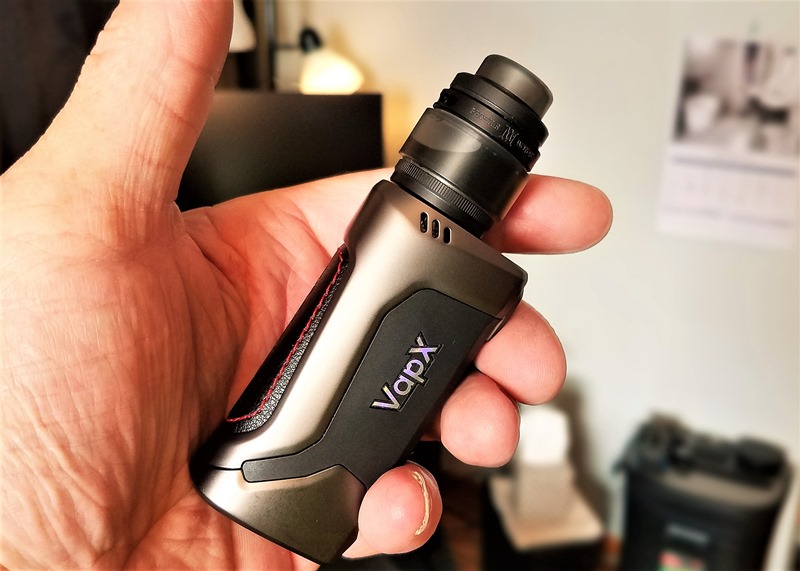
The Profile M has become a match for a new device that I recently reviewed – VapX Meteor 80W 510 Mod, to me they match so well it looks like they were made for each other.
PROS
- Great Flavor
- Attractive
- Very smooth airflow
- Short
- 24.5 Diameter
- 3 Types Of Mesh Included
- Top Fill
- 2 Drip Tips Included
- Easy To Build And Wick
CONS
- No Glass Bubble Tube
- Fillport Membrane Is Loose And Can Come Off
- Top Cap Does Not Lock Into Place
FINAL IMPRESSIONS
As you have seen and heard the M is a flavor banger because of the mesh coils as well as the distance of the coil to mouthpiece is pretty close . Having a clapton mesh coil gives me the warmth I like so that alone has me really liking it.
Wotofo gives the user everything that is needed to build it, heck you get 3 strips of mesh and 3 pieces of rope cotton so there’s 3 builds all included, and I think it’s a great value.
The M is very easy to build and wick and the airflow for a top air RTA is very smooth at any airflow setting with plenty of cloud production also.
One thing you will need with the M is juice and a lot of it because it plows through juice if wicked correctly but most mesh devices do so that’s no surprise but the M only has a 4.0mm capacity so filling will be often.
The M has no glass bubble tube so that might be a concern for some and not having a locking top cap is a definite concern for on the go or out and about, the membrane will stop any juice from spilling out though. Speaking about the membrane it is really loose and you need to pay attention when filling.
All in all though I like it and will continue to use it on a device I married it to as you seen in the picture above.
I would like to thank Healthcabin for providing the Wotofo Profile M for the purpose of this review. The Wotofo Profile M can be purchased at Healthcabin, don’t forget to first sign in to get the best price.
I hope that this review helped anyone looking to purchase the Wotofo Profile M.

Wotofo Profile M RTA 
Wotofo Profile M RTA 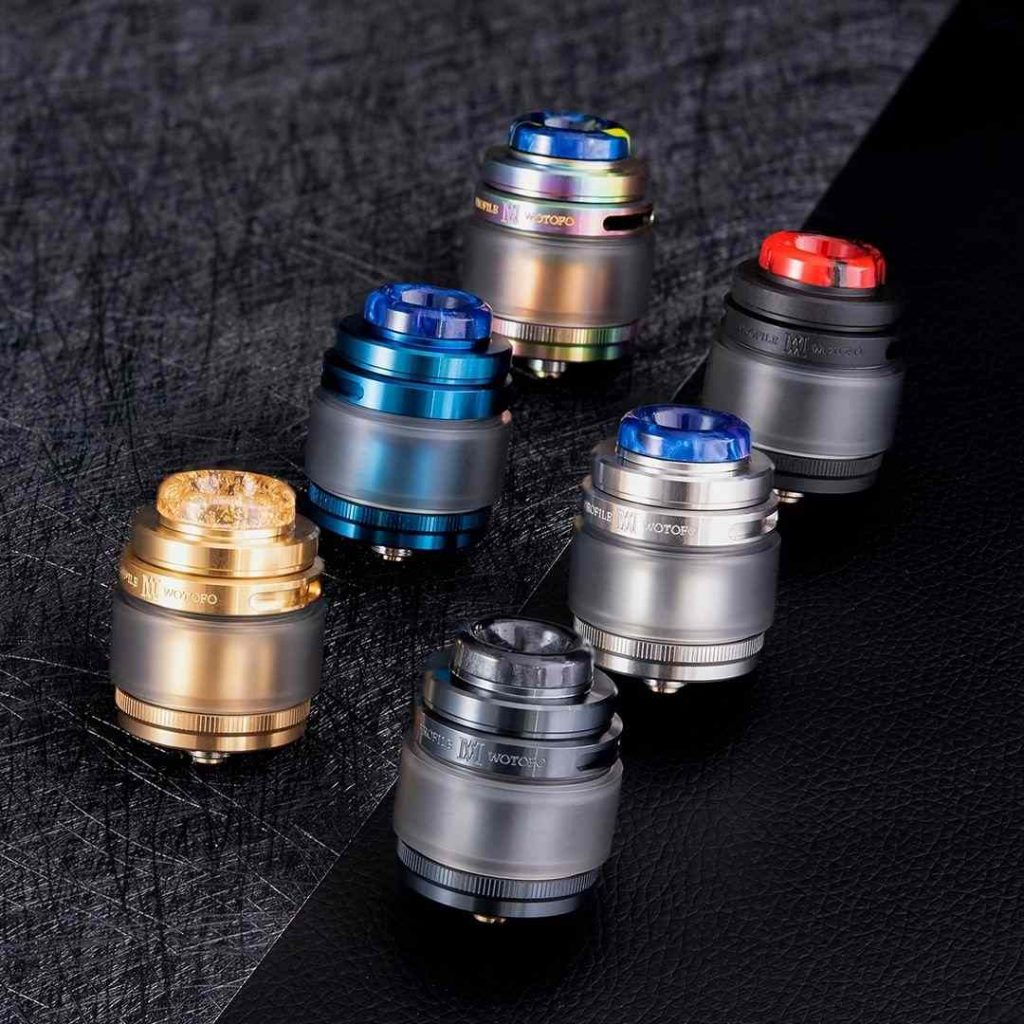
Wotofo Profile M RTA
This review was written by bigbob2322 – Bob from ECF, click to view original review there with more photos and more details.
