
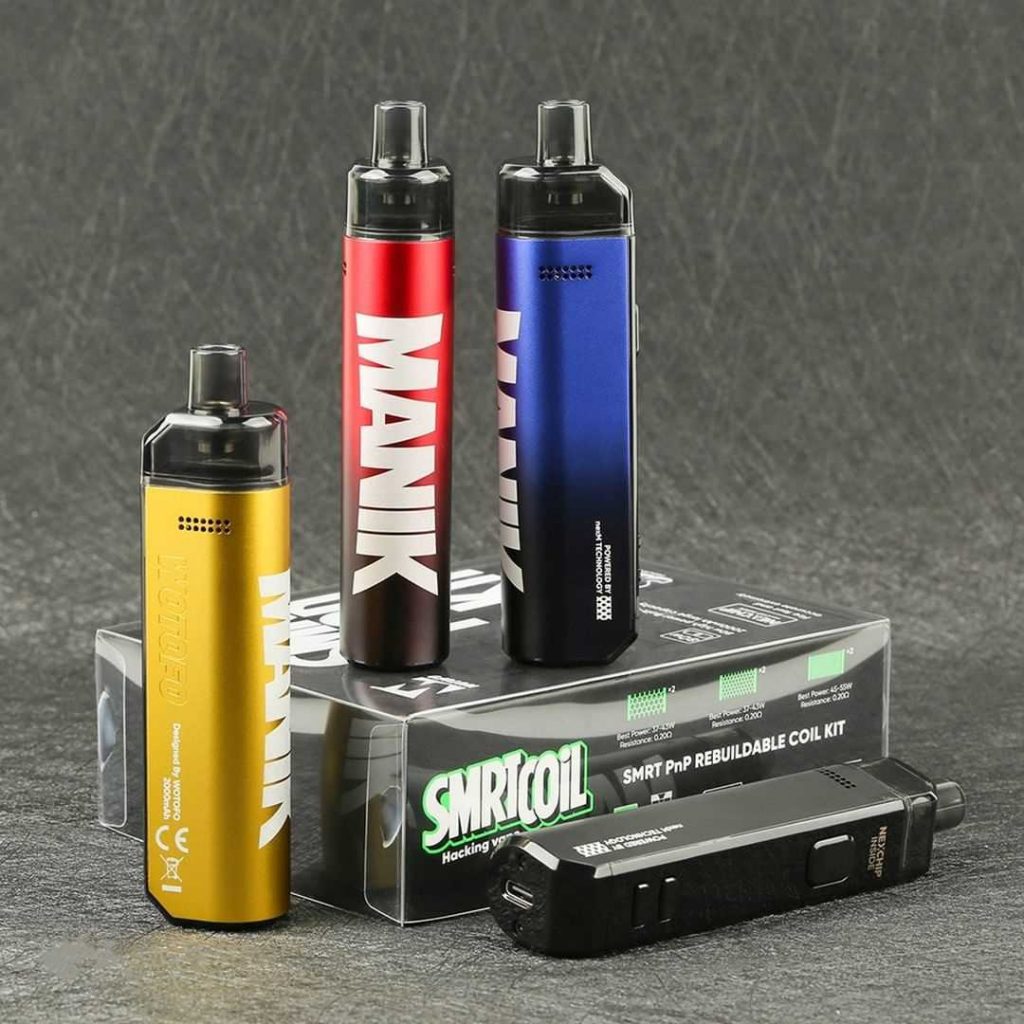
Hello again and welcome back for today’s review of the Wotofo SMRT Pod Kit that was supplied to me from Healthcabin for the purpose of this review. At the end of this review I will leave a link for the SMRT at Healthcabin. The SMRT is basically a Manic Pod Mod that has been shrunk down and had it’s weight considerably decreased by using a aluminum alloy, and instead of using a replaceable 18650 battery the SMRT uses a built in 2000 mAH battery. The Smrt has a special item that is included in the kit and it is a rebuildable mesh coil head shell with 6 different mesh strips, cotton as well as all the parts needed to build your own drop in coil, and it can be reused over and over again. I have to give a spoiler alert now ( The drop in mesh coils you build are indistinguishable from the factory stock drop in mesh coils for flavor and vapor production and are very easy to build ). That should have grabbed your attention,so let’s begin with some information on the SMRT Pod Kit with a rebuildable drop in mesh coil before the review. One last important fact is that the SMRT coils will work in Voopoo PNP Pod/Tanks as well as Vaporesso Pod/Tanks that take the GTX coils. Let’s get started the Wotofo SMRT Pod Review!
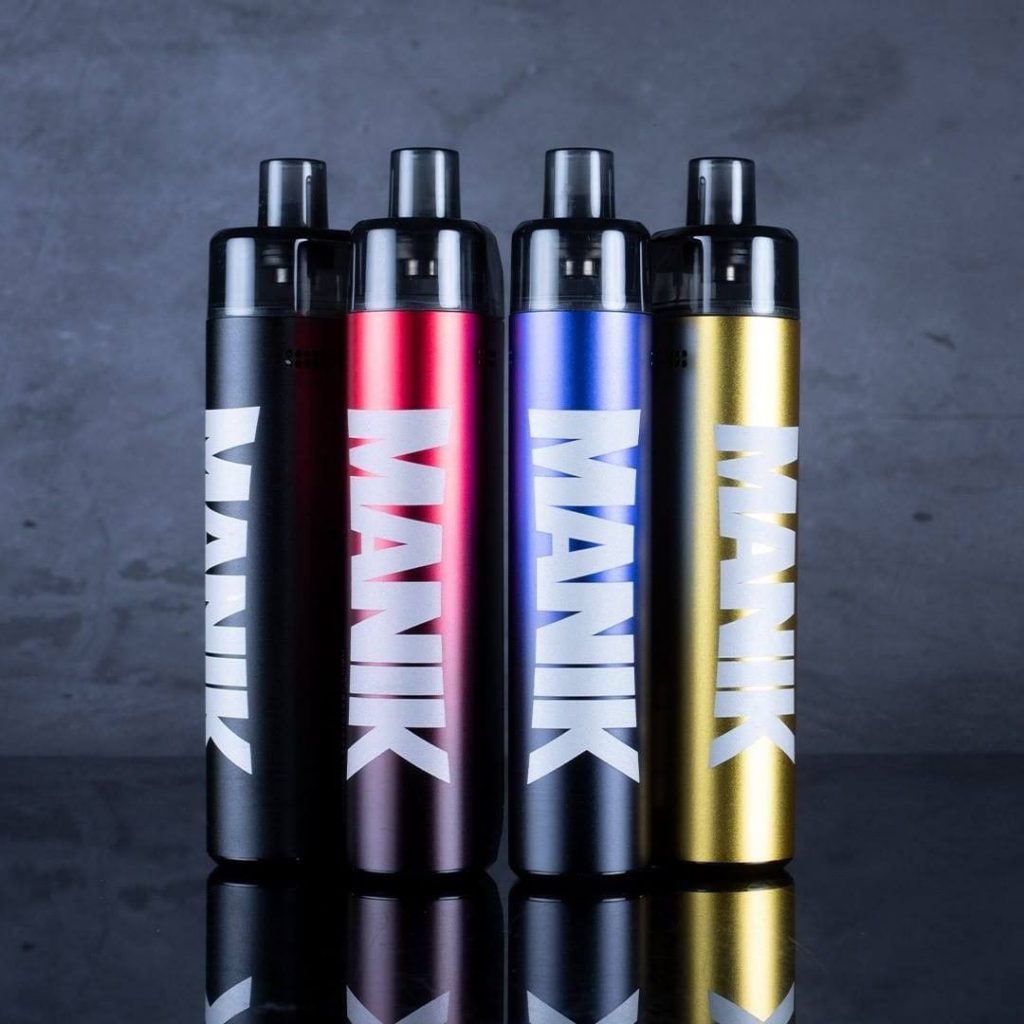
Wotofo SMRT Pod Kit 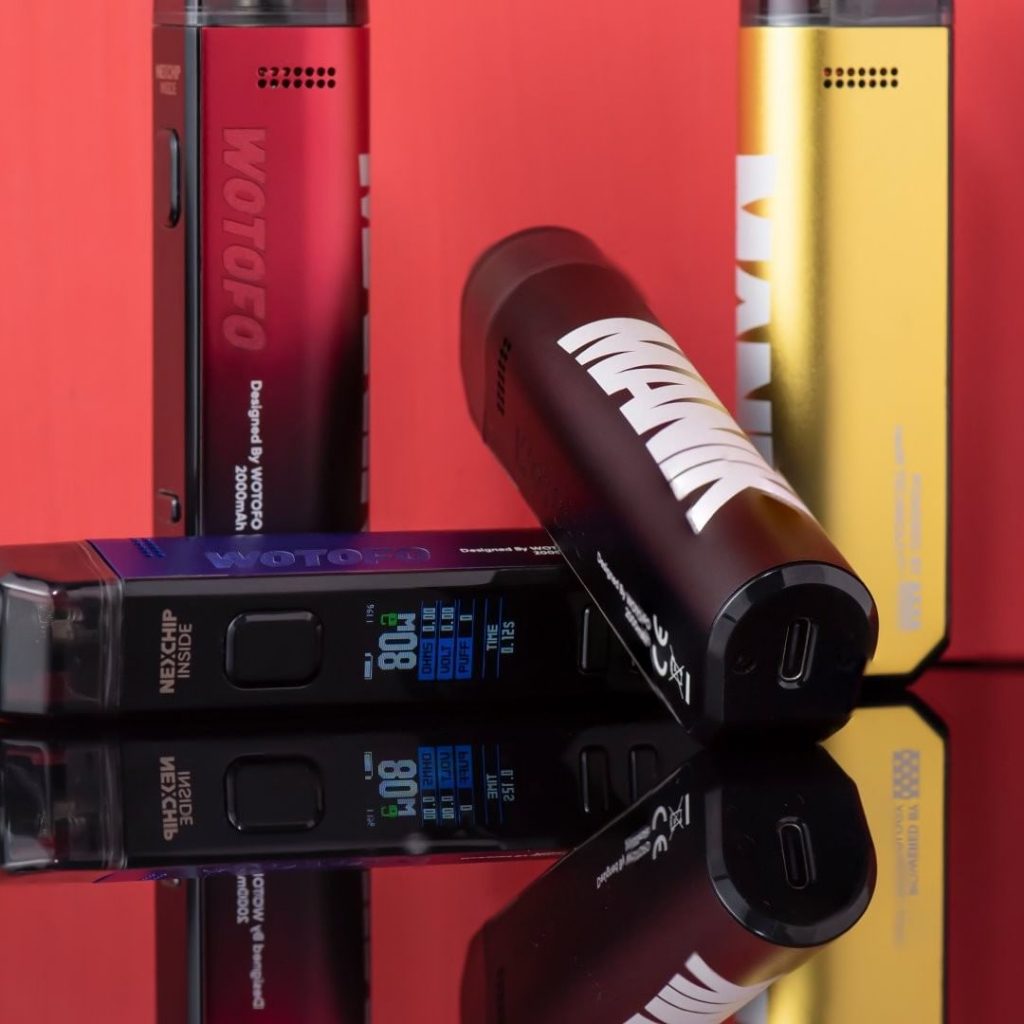
Wotofo SMRT Pod Kit 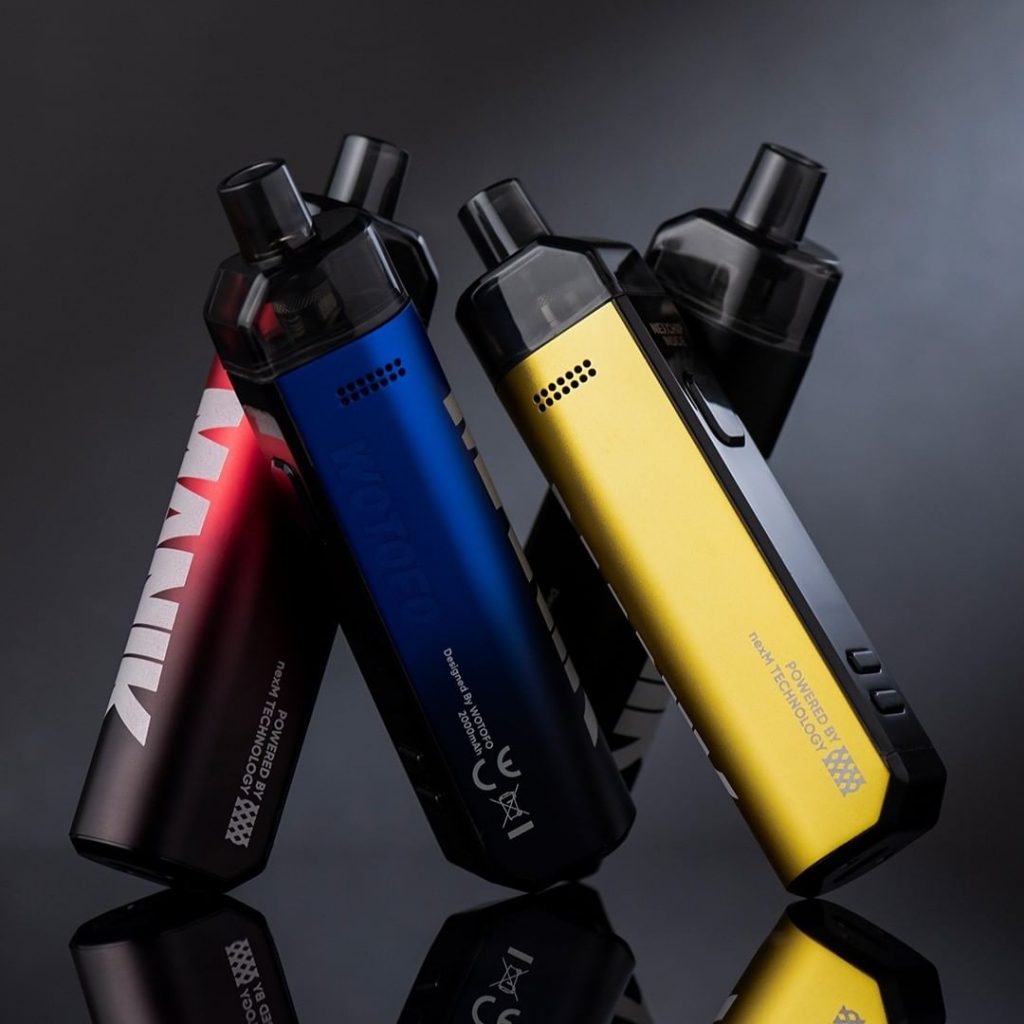
Wotofo SMRT Pod Kit
FIRST IMPRESSIONS
I have to say that Wotofo is listening to us as far as packaging their products better and not being as tightly packaged as in the past, I almost always had to destroy the package just to open it but the last 3 items from them has been a big improvement. They are still using the clear plastic top cover letting you see the product without opening it first.
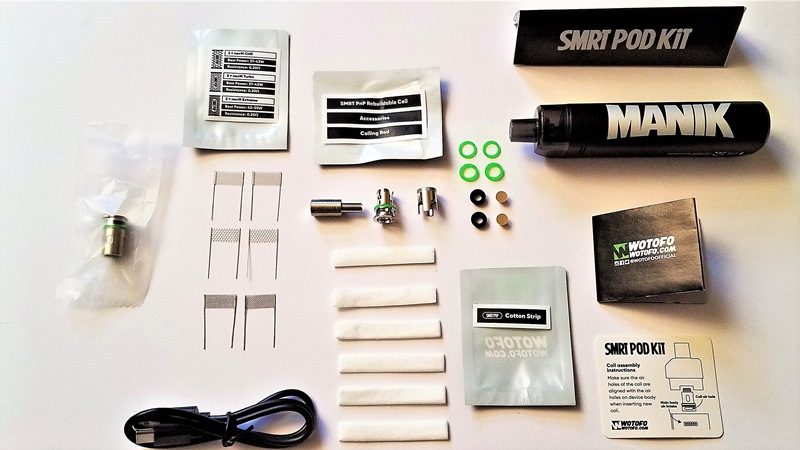
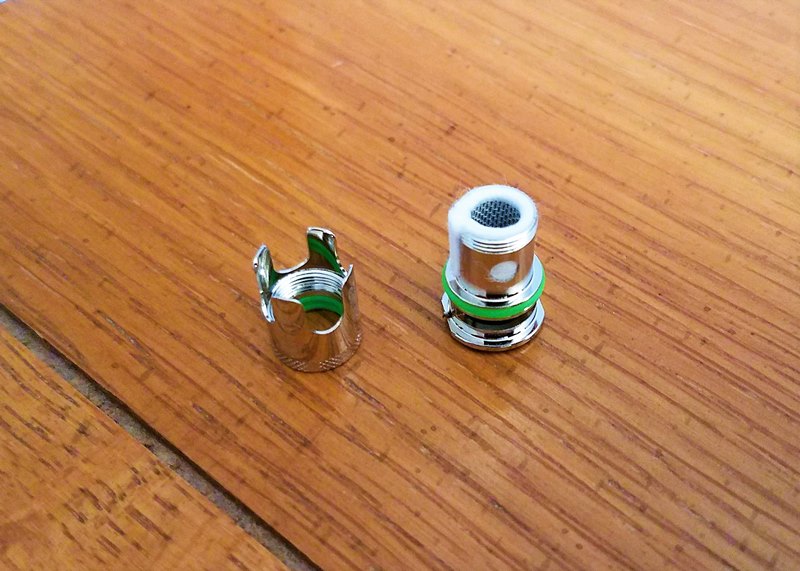
The device sits in a foam cutout , all your paperwork as well as 1 stock drop in mesh coil, charge cord and everything to make 6 rebuildable drop in coils including your coil shell with cap, 4 green o – rings, 2 rubber insulators, 2 metal contact pins, 6 pieces of cotton, 3 types of mesh strips with 2 strips of each type, and 1 coil bending rod . With everything included this is one of the most material rich kits I’ve seen, think about it 6 coil builds including the 1 stock coil gives you a total of 7 coils. ( FANTASTIC DEAL )!!!
SMRT DEVICE
The device itself is a featherweight being made of a aluminum alloy and is on the thinner side with the back of the device being rounded to fit the contours of your hand and the front being flat. The Pod fits in the top using 3 magnets that hold it in alright, I would have liked them to be stronger but these are adequate enough. The drip tip is proprietary and can’t be changed but is very comfortable to use.
The 4.5ml pod is lightly tinted but viewing the juice levels is no problem. The one thing that is a con with the SMRT Pod Kit is there is no airflow adjustment so if you want your airflow more restricted you will have to resort to the clear scotch tape method like I have done, there are 14 honeycombed air holes on each side of the device for a total of 28 air holes, I have 6 holes on each side taped for semi restricted vape. The fillport on the pod is just above the fire button and sits inside the device and is side fill with a nice large fillport and the rubber plug can be rotated out of the way while filling, there is a arrow pointing down with a lip to get a fingernail under for easy opening. When plugging the fillport make sure the plug is completely pushed down into place, sometimes it wants to fight you on this.
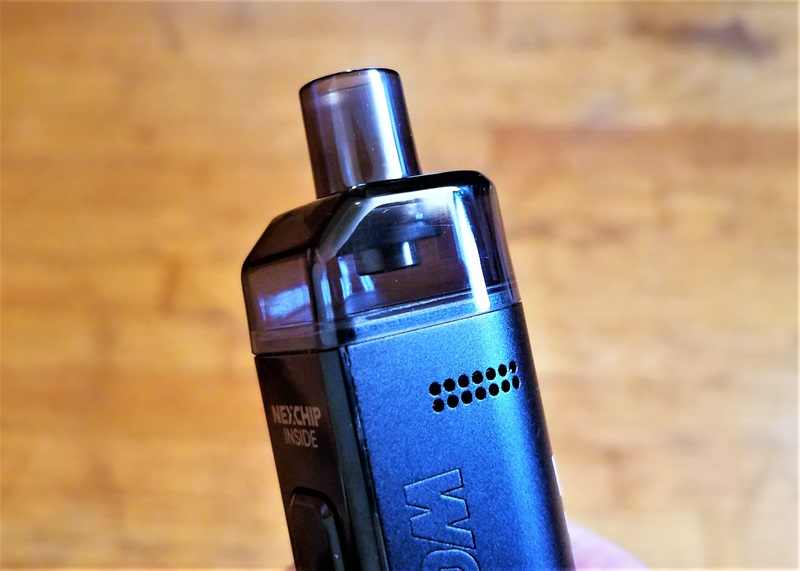
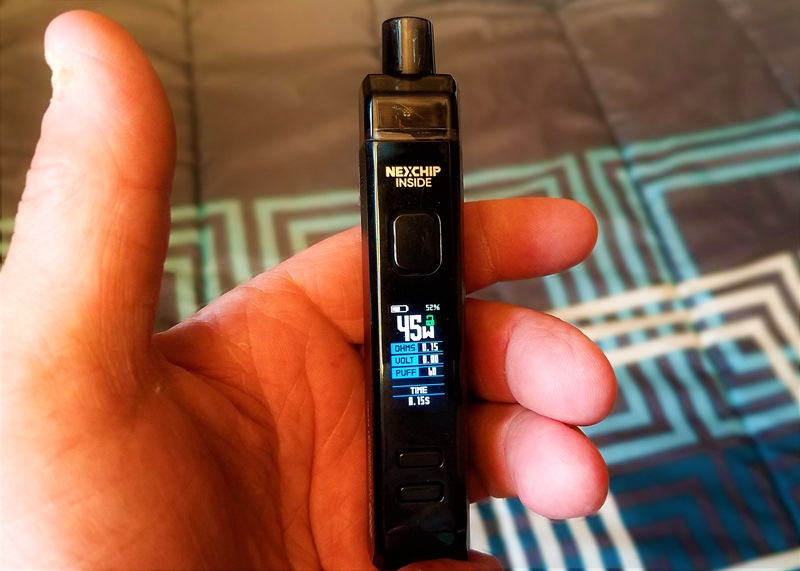
The front of the device is where the power button and + and – adjustment buttons are located with the power button on top and the adjustment buttons towards the bottom. The display screen is plenty bright enough as well as being clear and vivid with your choice of 6 color displays to choose from and they are blue,purple, white, red, tan, and green.
The display is as follows
- Left top is your battery bar with battery % in upper right corner
- Wattage is large and bold with lock/unlock symbol next to it, the lock and unlock symbols are also color coded ( green is unlocked-red is locked )
- Your ohms are below wattage
- Volts are under ohms
- Puff counter is under volts
- Time of puff is at the very bottom
COIL BUILD INSTRUCTIONS
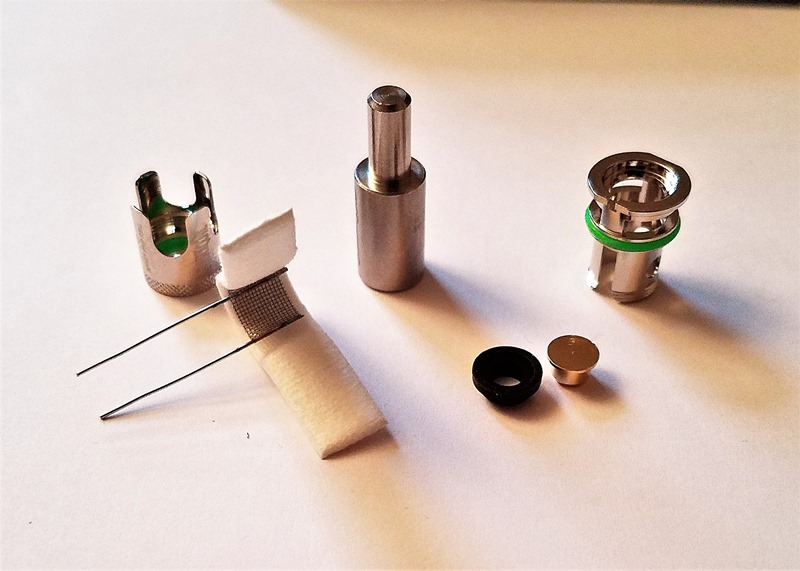
Building the coils is really a easy process, I am going to do a coil build also for you and hopefully my pictures show a bit more detail, all the parts you will need will be in the step by step pictures. ( LEAVE THE COIL ROD IN PLACE UNTIL THE VERY END )
# 1
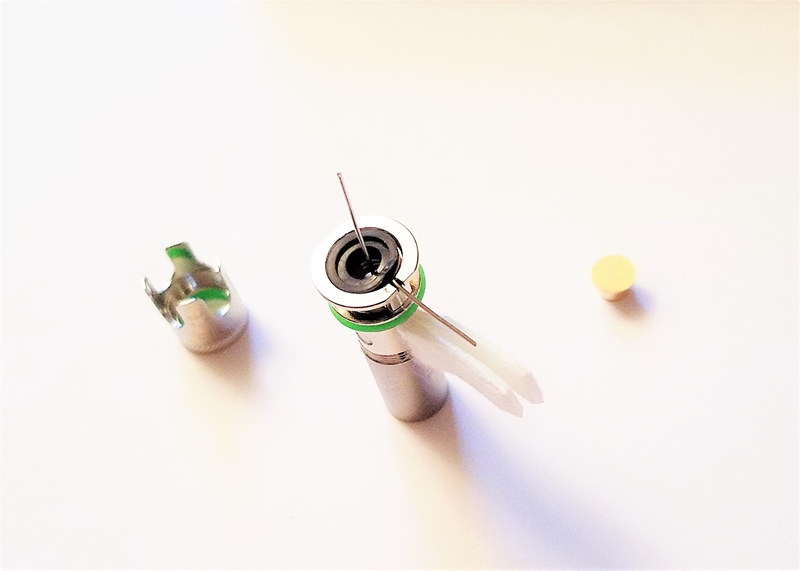
Have the parts needed sitting in front of you, and they are listed below. The small end of the building rod is the end for bending the mesh strip and cotton, I already pre bent the two in the picture below and unscrewed the top cap of the coil shell. You will also need a good pair of cutters not pictured or supplied in the kit.
* Coil building rod
* Your mesh strip
* Your black rubber insulator
* Your metal contact pin
* Your cotton strip
* Coil shell ( unscrew the top cap as shown below )
The slot of the coil is where you will be sliding your mesh strip wrapped in cotton through, with the mesh and cotton wrapped around the small end of the rod, pinch the two ends as tight as you can and begin pushing the rod through the coil shell letting the cotton ends ride down the slot while putting both tails of the mesh strip through the center of the coil shell. It is a very tight fit so the tighter you pinch the two ends on the rod the easier it will be. As the picture below shows the rod with the coil and mesh have been pushed through the center of the coil shell with the cottontails sticking out of the slot. You will notice a slot at the end of the coil shell, bend only 1 lead of the mesh strip down and fit it into the slot. ( DO NOT REMOVE THE ROD )
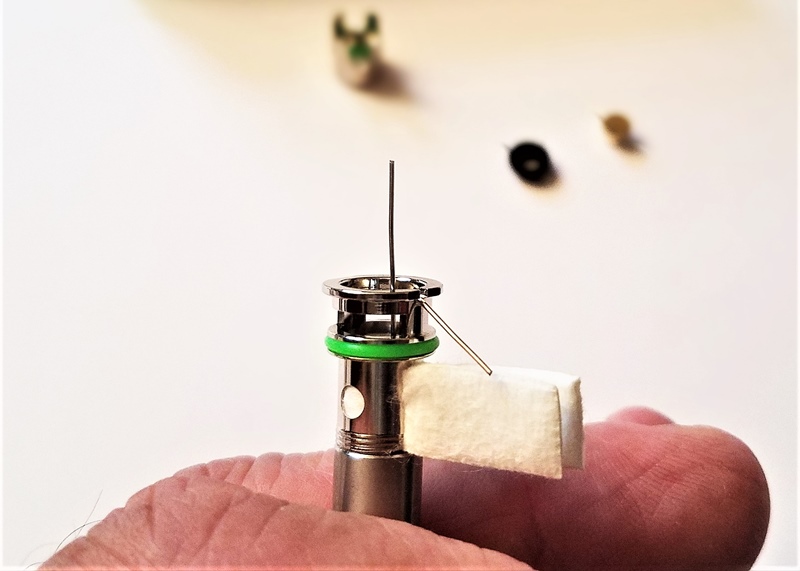
The next step is to install the black insulator, slip the non bent mesh lead through the black insulator and push it in the coil shell over the bent mesh lead. ( DO NOT REMOVE THE ROD )
The next step is to install the metal contact pin by pushing it in the center of the black insulator which will bend the mesh lead outward, push the contact pin in tight .
( DO NOT REMOVE THE ROD )
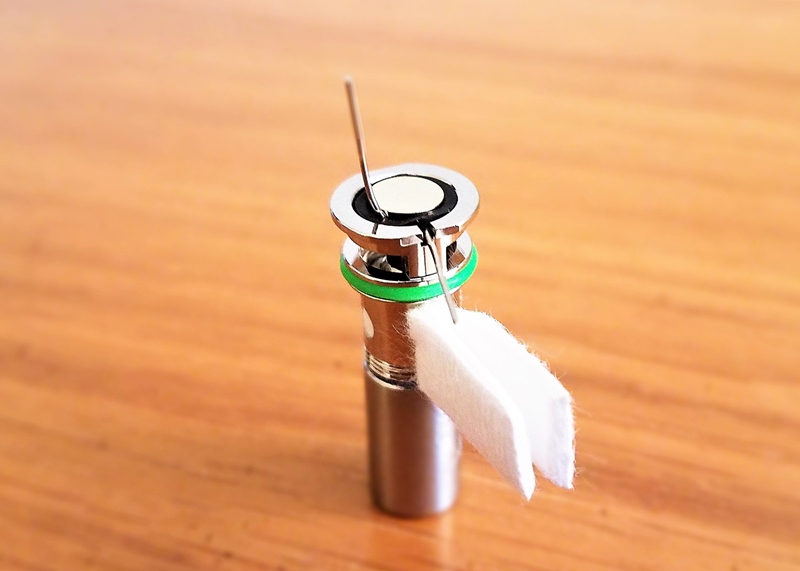
Now is when you will cut the two mesh leads and cottontails off as close as you can get.
( DO NOT REMOVE THE ROD ) below picture shows mesh leads cut as well as cottontails cut.
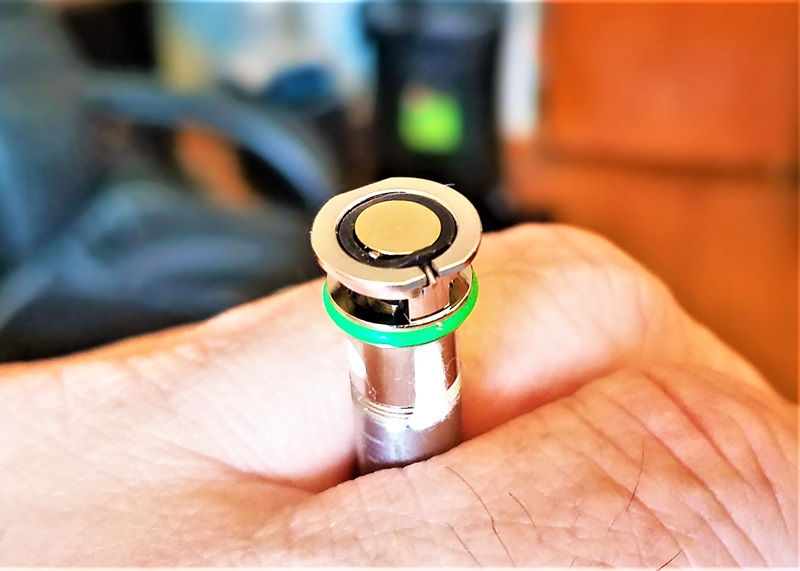
Now slowly pull the rod out and screw on the top cap of the coil shell and your coil is done. This is the easiest drop in coil building coil kit currently made. Comparing the stock drop in coil and the rebuildable coil ( I could not tell the difference vaping them both side by side ).
I focused mainly on the rebuildable coil in this review because I think it is the star in this super value packed kit. The SMRT device works great and the size and weight make it a fantastic on the go kit, you won’t get a full day from the 2000 mAH battery but for about 6 hrs you are good to go. I was able to get 217 vapes on a full charge, everyone vapes differently so your vape time will vary.
Another nice thing with the SMRT Pod is when you can no longer see juice there still is a small reservoir at the base of the pod that sits inside the device. The device is a super fast scroller and it round robins, also the device has no ramp up and fires very fast.
There is no menu system with the SMRT just a few button combinations to remember and I will list them below for you.
- On/off is 5 quick presses of the fire button
- To change your color of the display quickly tap the fire and up button simultaneously
- To lock/unlock wattage press and hold the up and down buttons simultaneously
- To clear the puff counter press the fire and down button simultaneously
- To lock/unlock the fire button press it 3 times quickly
PROS
- Featherlight
- Great flavor
- Massive value packed kit
- Bright display
- Color display
- Vivid display
- Best drop in coil building kit to date
- Easiest drop in coil building kit to date
- Smooth airflow
- No leaks
- Fast firing
- Round robins
- Scrolls fast
CONS
- No airflow control
- Charge port on the bottom
- Very heavy branding
- Up and down buttons rattle slightly when shaken ( DON’T SHAKE YOUR DEVICE )
FINAL IMPRESSION
Well folks I hope that I covered everything about the SMRT Pod Kit for all of you, I know that I focused mainly on the rebuildable coil that comes in this kit but I feel that that is the main attraction of the kit and having a solid device to go with it is a win win for everyone. I have been using the smrt for 7 days and absolutely love the entire value packed package. I mean the device is solid for what it’s intended for and virtually getting 7 coils including the factory built one alone is a fantastic value in itself.
The coil building kit has everything you need to make 6 coils that are virtually indistinguishable from a stock factory build coil in the flavor and vapor department. The only thing the kit does not provide is a good pair of cutters for clipping the leads of the mesh strip as well as cutting the excess cotton.
Having no airflow adjustment stinks but I used the old clear scotch tape trick covering 6 honeycombed holes on each side of the device and that finds my sweet spot for my airflow preference, airflow is smooth no matter how many holes are covered and no whistle ever occurred trying different combinations of blocking air holes.
So in closing do I recommend the SMRT Pod Kit ( 100% YES ) run don’t walk and get this MASSIVE VALUE packed kit Wotofo SMRT Pod System Kit
I would like to thank Healthcabin for providing the SMRT Pod Kit for the purpose of this review. I also hope this review helped anyone looking to pick this value packed deal of a kit. Pick one up folks it’s a WINNER.
Wotofo SMRT Pod Kit 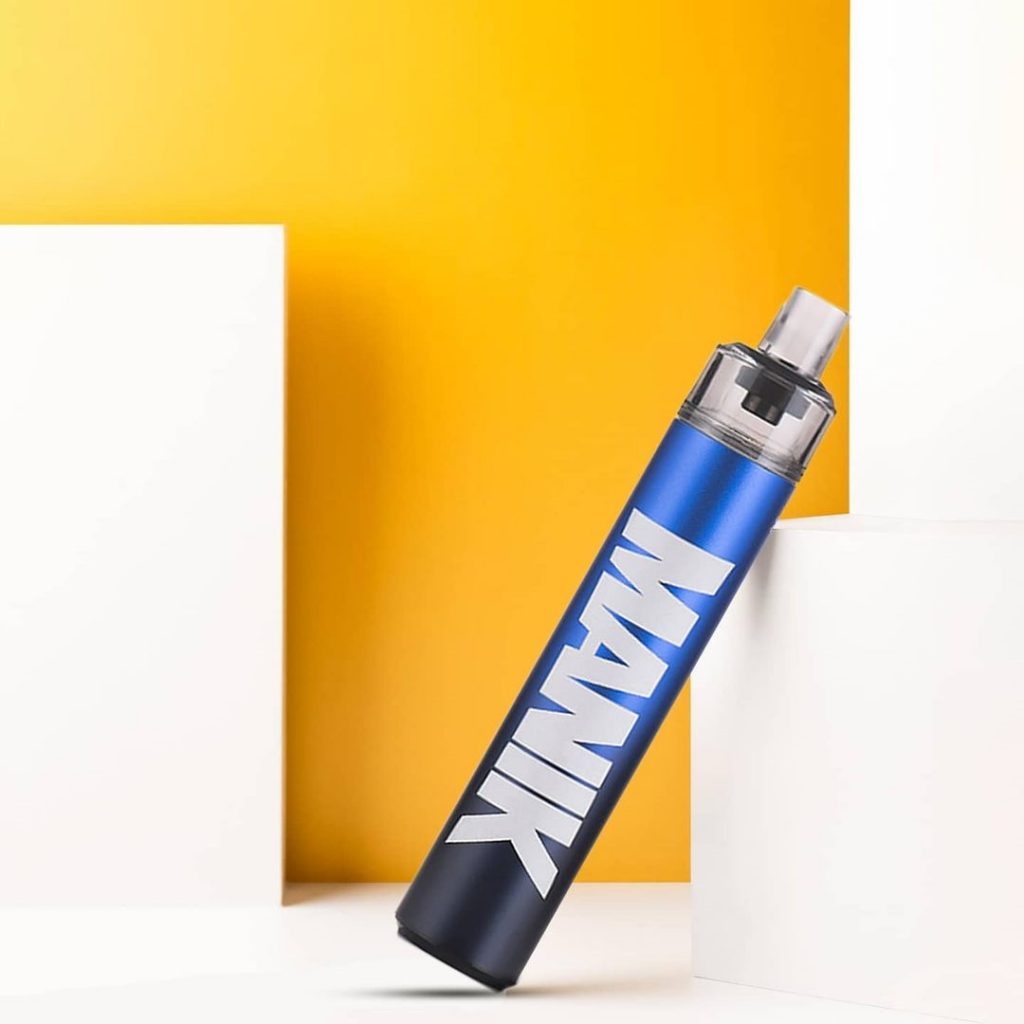
Wotofo SMRT Pod Kit 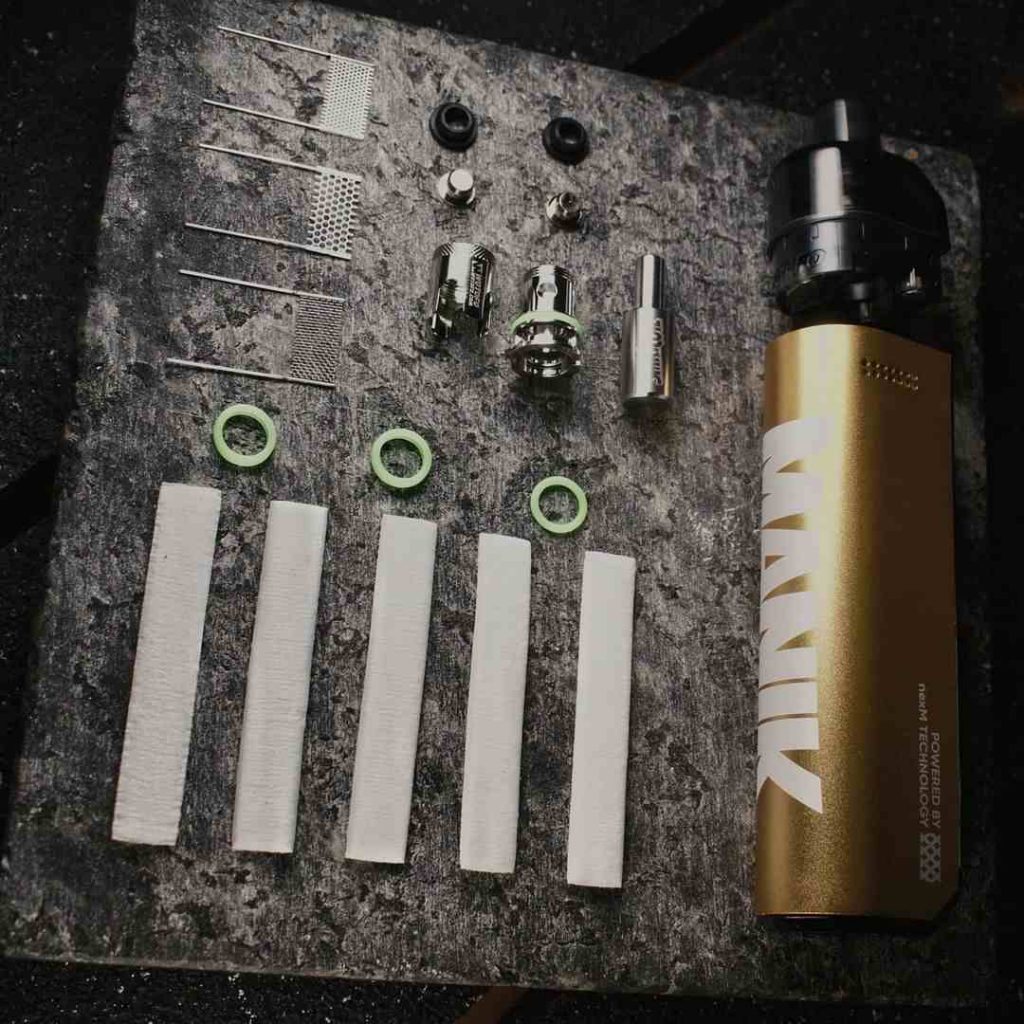
Wotofo SMRT Pod Kit
This review was written by bigbob2322 – Bob from ECF, click to view original review there with detailed instructions of building coil.
